How to Hide Filters With Dashboard Actions in Tableau
See a special technique for hiding Tableau dashboard filters until an action is initiated. View this article for full instructions!

Here's the scenario: You are building a Tableau dashboard with a lot of information and want to improve end user experience/exploration through use of pop open sheets created with dashboard actions.
As a trusted implementer of business intelligence best practices, Zuar is relied on for Tableau consulting and Tableau server deployment. That’s why we want to help you understand this process a bit better.
Problem: You have a filter that is exclusive to the pop open sheet and also need to hide it when the sheet is hidden as to not confuse end users.
Solution: Use a special floating technique that allows you to hide the filter off the dashboard until the action is initiated, allowing you to reveal the filter at the same time as the sheet. Some things to note before we begin:
- This will work best if you can use fixed dashboard sizing.
- A lot of customization can be added to this solution, so adapt to fit your needs.
This is a simple but effective method to achieve the aforementioned solution. Let's use superstore for this demo.
Here is the final result that can be downloaded in case you'd rather just dissect the workbook. Select any mark in the below viz...
Use a Dashboard Action to Show/Hide a Worksheet on Tableau
If you've already created a show/hide sheet, skip to here.
Let's first start by building the show/hide sheet. For this demo, I'm going to use a time series on the Shipping dashboard that comes standard in the Superstore Demo Workbook and the filter I would like to expose and hide will be a date range slider made from Order Date .
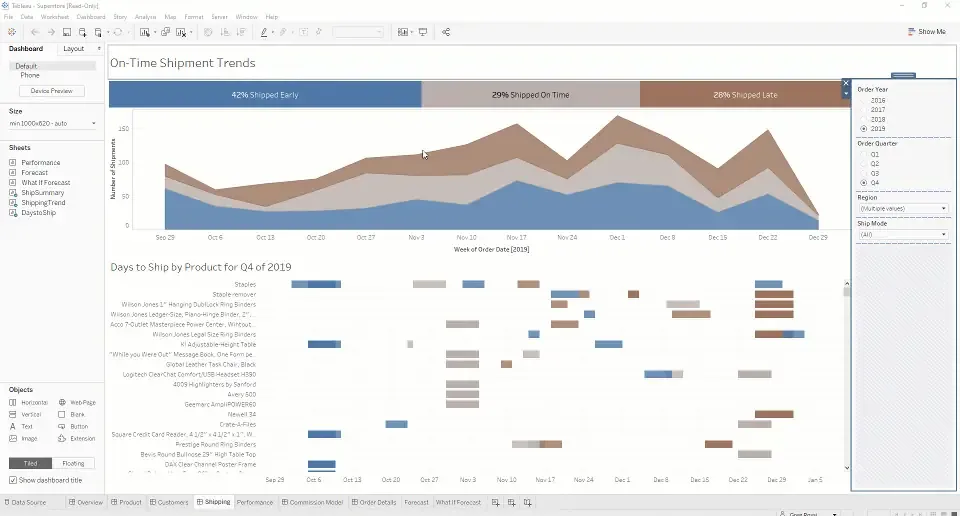
- Go to the ShippingTrend sheet located on the shipping dashboard and add a continuous data range filter from the
order datefield. - Go back to the dashboard and reveal the date range filter. Place it below the trend. Notice that this filter is exclusive to the ShippingTrend and will not be useful if the trend is hidden
- Fix the dashboard sizing, this example is set to 1300 x 920 (Use whatever works best for you but fixed will likely work best for this trick) > Remove Phone Layout.
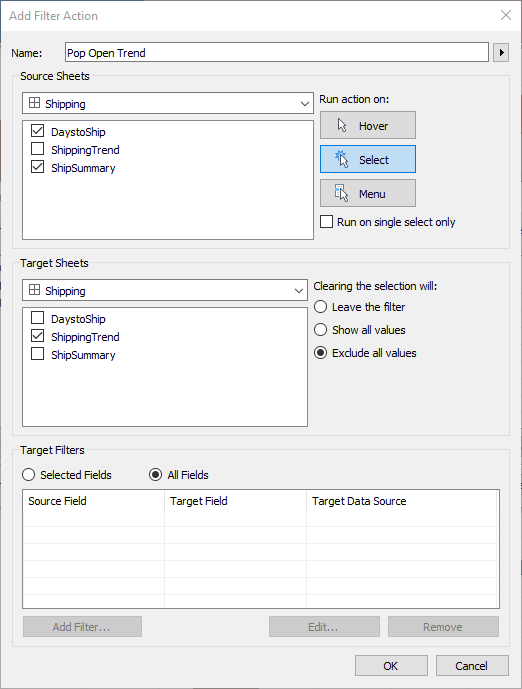
- Activate the show/hide dashboard action by navigating to Dashboard > Actions > Add Action > Filter.
- Name the filter something like
Pop Open Trend. I would like both DaystoShip and ShipingSummary to filter and reveal the hidden container so leave them checked for source sheet and select only ShippingTrend for target sheet. SetRun action on: **Select**andClearing the selection will: **Exclude all values**. LeaveTarget Field: All Fields - Click
OK
Select any mark on the summary sheet or daystoship and clear the mark to hide the trend. If there is a large blank space where the sheet used to be, you will need to remove fixed sizing from the container by clicking the pin icon. This will allow it to collapse.
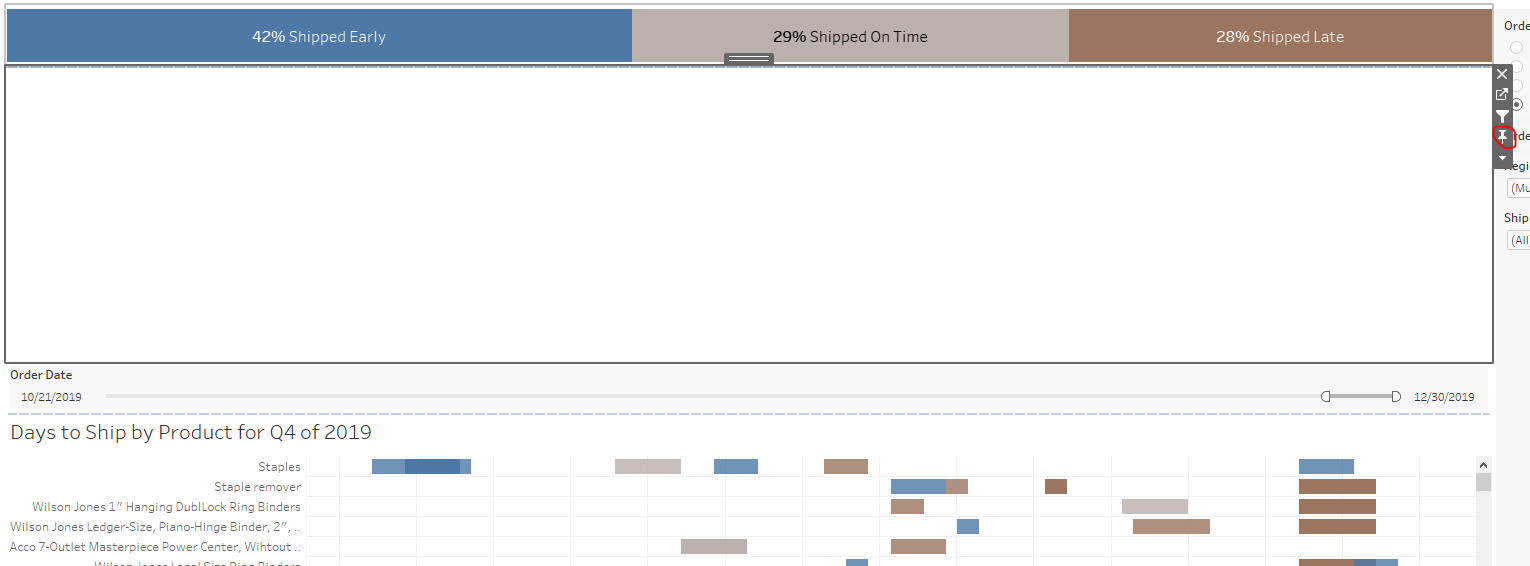
The dashboard should now be completely hidden with a random date slider under the top bar that is now useless because you can't see the sheet that it is targeting. This will be confusing for end users and is a bad experience from a UI perspective.
Related:


Hide the Filter on the Tableau Dashboard
Now let's hide the filter so that it is only visible when the corresponding sheet is revealed. To do this we will float the filter and have it pop into view when the dashboard is activated.
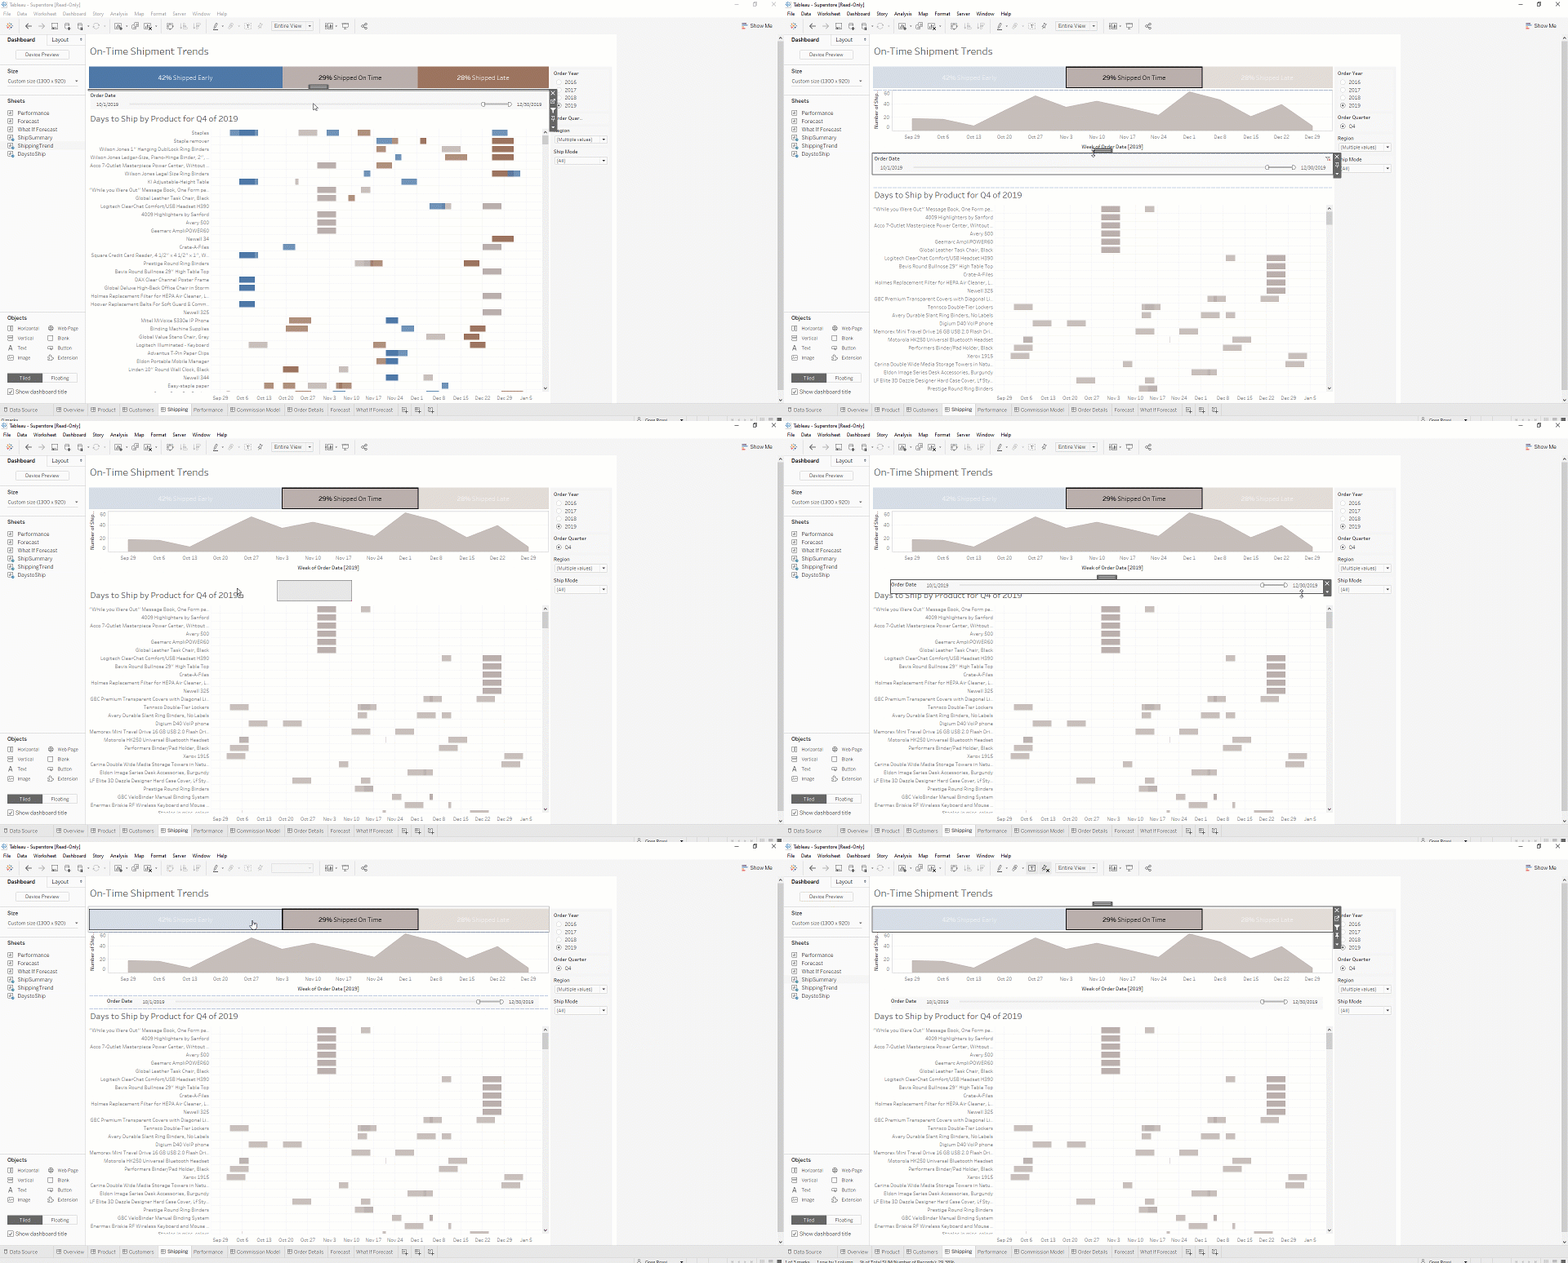
- We don't want the filter to overlap a different sheet when it's revealed so let's drop a blank right below it. This will be the spot the filter will cover when it pops open.
- Next, we need to find the exact location the filter will pop open when the dashboard is revealed. So, click a mark and reveal the trend so we can see where the filter should be located. Because we inserted the blank container, it should be exactly where the filter can live.
- Float the filter above the blank container so that it look like it is under the main trend.
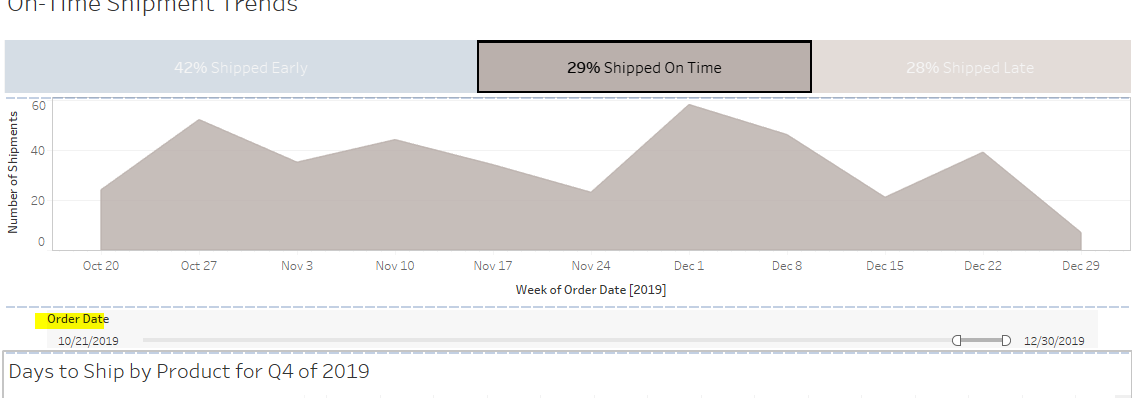
Now for the Tricky part. We essentially need to position the filter off the dashboard and use a blank pop-open sheet that will push the filter into view when the trend is revealed.
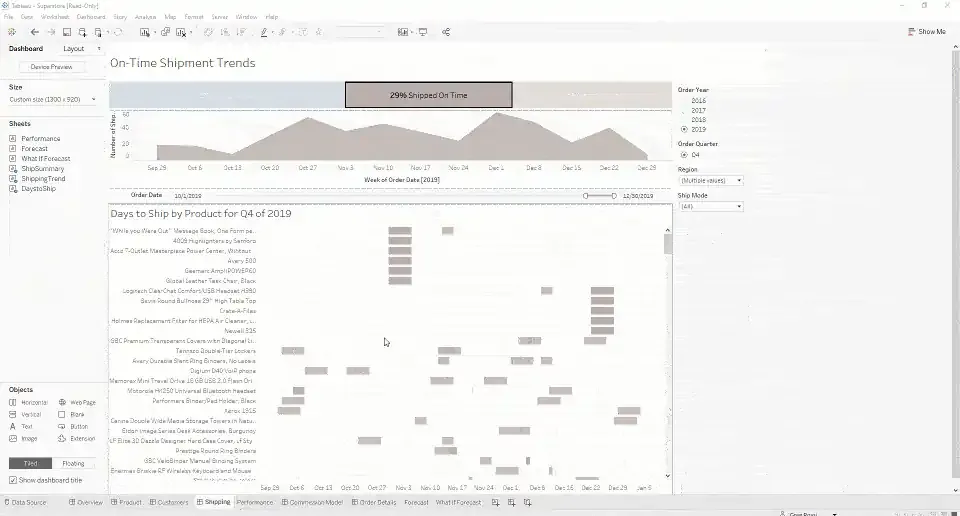
- Create a new sheet and call it something like
Cover Sheet. - Make sure you are using the same data source as the sheets on the Shipping Dashboard. Sample - Superstore
- Drag
Number of Recordsto the Rows shelf and set the aggregation to MIN - Do the same process but drag the second
MIN(Number of Records)to Columns and then to Text. - Set Mark Type to Text > Edit the text > Delete everyting so that there is no text and the sheet is blank
- Hide all Axis and remove all grid and zero lines so that you have a completetly blank sheet.
You should now have a completely blank sheet. Head back to the dashboard and drag a floating horizontal container onto the dashboard (Ctrl + Click and Drag Horizontal Container). We will now place the filter and the Cover Sheet into this container, set it wide enough so that it goes off screen, and make sure our actions target the Cover Sheet to create a show/hide effect.
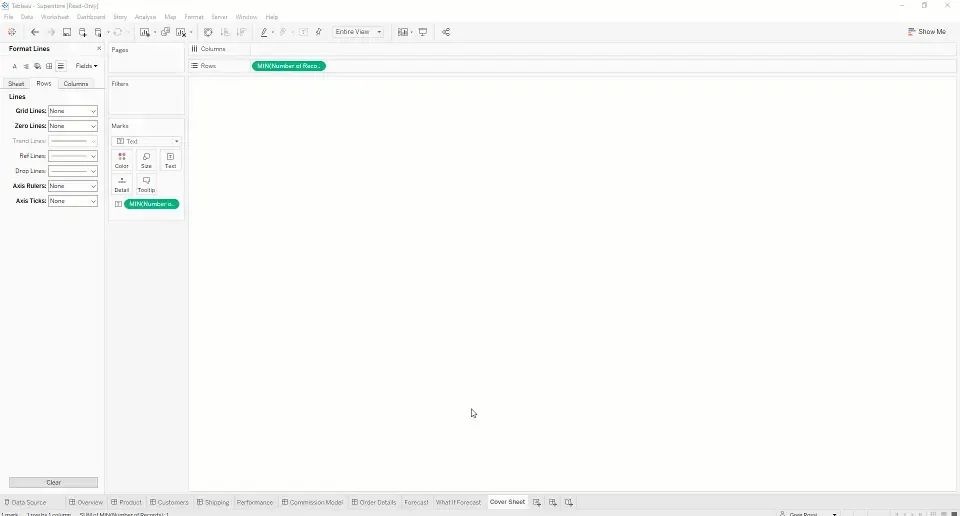
- With the floating horizontal container selected, use the Layout tab to increase the width of the container to be nearly twice the size of the dashboard. I will make it 2000px.
- In this example, I want to hide the filter to the left of the dashboard so I will drag the vertical container to align the right side with the right edge of the trend.
- Drop the cover sheet into the horizontal container and hide the title > Drop the filter bar to the right of the Cover Sheet. Remember, if you need to move the floating horizontal container once items have been placed inside, make sure you double click the container holder so that it selects everything inside the container
- I will now adjust the width ratio between the Cover Sheet and filter so that the filter is aligned with the bottom of the trend (making it look like it had previously). I also adjust the height of the entire horizontal container to only cover the blank place holder container.
- Remember to Fix the width of the filter but unfix the width of the cover sheet. This will cause problems otherwise
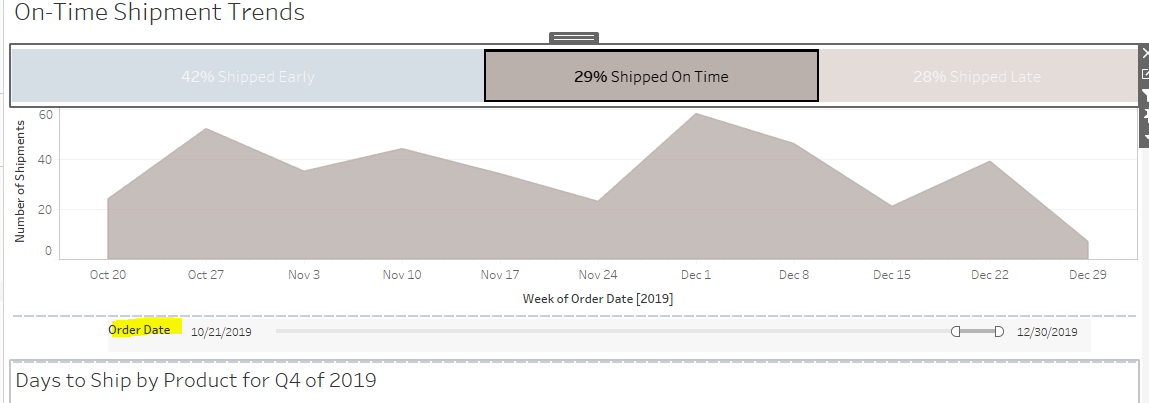
You will now want to target the Cover Sheet so that it collapses like the trend by adding it to the dashboard action.
- Dashboard > Action > Click Pop Up Trend > Edit
- Uncheck Cover Sheet on the Source Sheet list but leave it checked on the Target Sheet list.
- OK

Related:
Click and unclick any mark on the dashboard and you should see the Cover Sheet collapse like the trend line. When it collapses, the filter bar should slide to the left. The last step is fine tuning the placement so that the filter bar goes completely off screen when the cover sheet collapses.
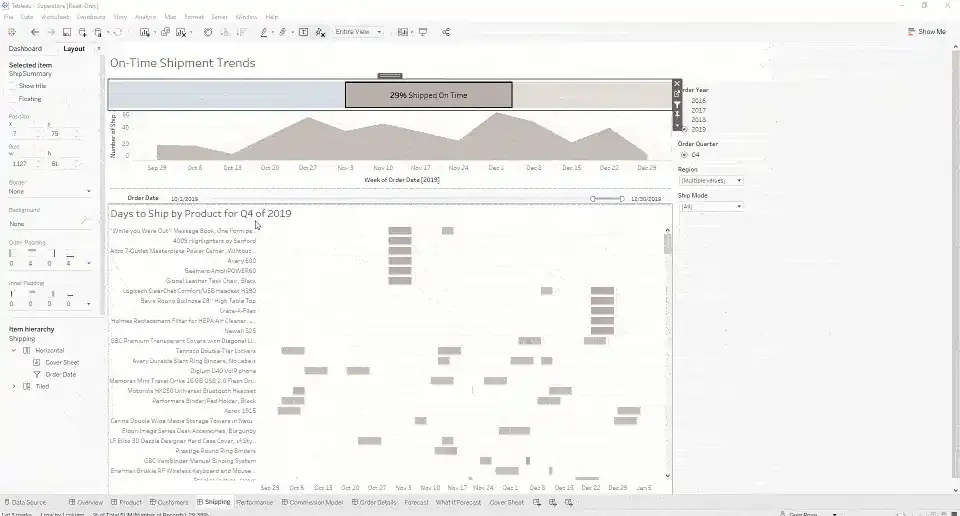
To do this you can:
- Collapse the cover sheet by deselecting all marks and then drag the filter to shrink the width
- Use the Layout pane to move the entire horizontal container off the dashboard by decreasing the x position until the filter is no longer visible.

And that's it! You should now be able to hide and reveal the filter with the corresponding sheet in Tableau!
Still need more guidance? Zuar’s certified Tableau consultants use visualization best practices to design interactive Tableau dashboards. Talk with our team today to learn more about our Tableau consulting packages.
Take advantage of everything else Zuar offers to companies using Tableau!
- Zuar Portals are an easy way to provide branded Tableau dashboards. Monetize your data or provide secure access outside of corporate firewalls.
- Transport, warehouse, transform, model, report & monitor. Zuar Runner gets data flowing from hundreds of potential sources into a single destination for Tableau.
- Read our other articles Tableau-focused articles, such as:

