Trusted Ticket Authentication With Tableau Server
This article describes how Tableau trusted authentication provides Single Sign-On (SSO) for embedded analytics in third-party applications.

This article describes how the Tableau trusted authentication provides Single Sign-On (SSO) for embedded analytics in third-party applications.
With Tableau's recent focus on Embedded Analytics, we at Zuar are getting a lot of questions about how to enable a seamless user experience. What are the tableau server requirements to use the trusted authentication Tableau provides? How do I tie Tableau Server authentication to the authentication system I already have in my application?
The #1 stumbling point is authentication. Getting this right is not only crucial for the usability of your application, but also for security, ensuring that the user sees the correct dashboard(s) and data. Trusted tickets are the primary method for Tableau trusted authentication. Even if you use SAML for your application, you're likely going to end up implementing trusted tickets too.

Intended Audience & Required Knowledge
This article is for a developer trying to embed Tableau Server visualizations into their third-party application and tie it to their existing authentication mechanism. Following the concepts requires a working knowledge of building a web-based application. The good news is that if you already have an existing app with a working authentication mechanism, you've likely got all the background you need.
What are Trusted Tickets?
A trusted ticket is a one-time-use token that grants access to a particular Tableau dashboard using a web browser. Once a user has a ticket, he/she has a fixed amount of time to redeem that ticket (three minutes by default). There is no need to keep the ticket secret during or after use since a Tableau trusted ticket cannot be reused. Tableau Server must be configured to allow a particular server (or set of servers) to generate tickets on its behalf. These server(s) are sometimes referred to as Ticket Brokers and are whitelisted on Tableau Server (hence the trusted part).

Overview
The Tableau documentation provides good overview of the trusted ticket authentication process here, and Bryant Howell - a sales engineer at Tableau - has a great article on Tableau And Behold. Here is an overview of the ion Tableau trusted authentication process from a standard web architecture perspective using a Single Page Application (SPA).
General steps for using Tableau trusted authentication:
- The user loads a page containing an embedded Tableau dashboard.
- The front-end calls the back-end to get a trusted ticket.
- The back-end server sends a POST request to Tableau Server to get a trusted ticket.
- Tableau Server responds with a ticket.
- The back-end returns the ticket to the front-end.
- Redeem the ticket and display the Tableau dashboard.
1. The user loads a page containing a Tableau embedded dashboard
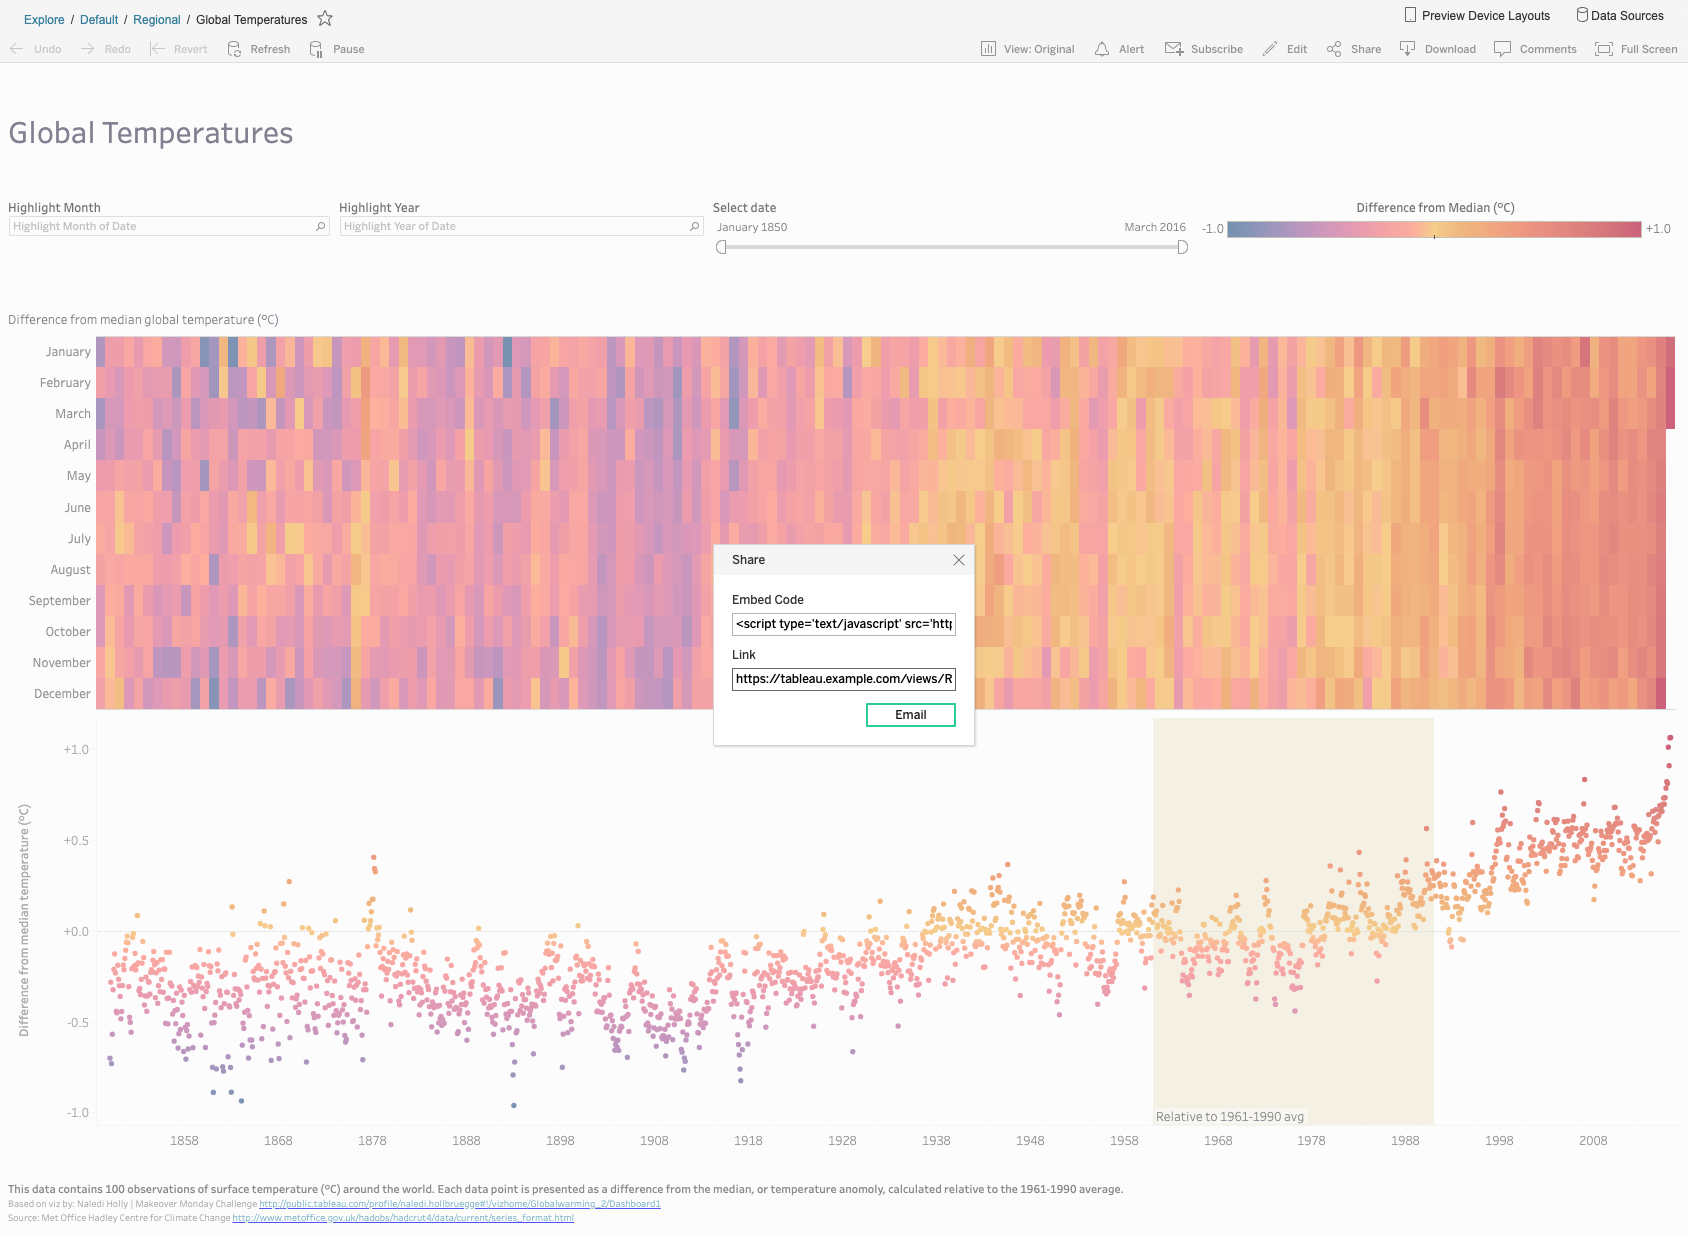
This page loads the desired content via a URL modified from the Share button on the embedded dashboard in Tableau Server.

There are two options, Embed Code and Link, each of which contains the URL. These perform essentially the same function, but there is one thing to note: If you are using a front-end web framework, then that embed code may not work. The reason is that such frameworks don't execute dynamically loaded <script> tags and it happens on a case-by-case basis. For instance, AngularJS with jqLite doesn't work, but AngularJS with full jQuery does. When in doubt, use the link which is easy to do in front-end framework as it provides data-binding.
The link obtained from the share button will look like:
https://tableau.example.com/views/Regional/GlobalTemperatures?iframeSizedToWindow=true&:embed=y&:showAppBanner=false&:display_count=no&:showVizHome=noThe link specifies not only what view to load but how to display it. You can find the display options described here.
The link to use with a ticket for Tableau trusted authentication looks like this:
https://tableau.example.com/trusted/{ticket}/views/Regional/GlobalTemperatures?iframeSizedToWindow=true&:embed=y&:showAppBanner=false&:display_count=no&:showVizHome=noWhere {ticket} is replaced with the actual trusted ticket (obtained below). This URL is obtained from the one from the Share dialog by just prepending the path info with /trusted/{ticket}.
2. The front-end calls to a back-end server, i.e. a ticket broker, to get a trusted ticket
This call is done in the standard way the front-end talks to the back-end and is entirely application dependent. If you have an existing application, this mechanism has already been determined and can be used (Let's be honest, it's a RESTful API).
3. The back-end server sends a POST request to Tableau Server to get a trusted ticket
Your server endpoint initiates a POST request containing the username and optionally the site as application/x-www-form-urlencoded data to Tableau Server. In this case, your server endpoint is acting as an HTTP client for Tableau. The request will look something like this (but you'll likely use a standard HTTP client library that handles the details):
username=matt&target_site=example
NOTE: This is a critical step in Tableau trusted authentication process.
Tableau Server is configured to trust your ticket broker application explicitly and believes the user you specify. It is crucial that you map your local users to Tableau Server users correctly. The resulting ticket can be used to see any dashboard to which the user has access. Think about handing out tickets for HR users incorrectly; there are no limits to what could go wrong due to misconfiguration.
The best practice is to use the identity mapping, if at all possible. If your application user's login is matt then make their Tableau Server username also be matt. This method makes provisioning straightforward and decreases the chance of errors. There should be a very compelling reason not to configure your system this way.
4. Tableau Server responds with a ticket
This POST response body contains the ticket or -1 if something goes wrong in the Tableau trusted authentication process. In the latter case, the Tableau Server returns no additional information as to why (although the server logs provide more information). This error could be anything from the username or site being invalid to trusted tickets not being correctly set up on Tableau Server.
If the call is successful, the result looks like:
1Js-q1jGTxO0RllpcrtPag==:vMJkJuzL06CLBHINVQ4ChBDu
The above is a real trusted ticket response from a real Tableau Server, but since it's a one-time-use ticket, it's safe to show publicly. The response is text/plain with no additional encoding so the entire body is the ticket.
5. The back-end returns the ticket to the front-end
The back-end responds to the request initiated in #2 above. There is rarely any need (possibly aside from logging) for the server to do anything with the generated ticket. Since the trusted ticket is only useful once and for a limited time, there is no point in storing it.
6. Redeem the ticket and display the dashboard
The front-end redeems the trusted ticket directly with Tableau Server to show the dashboard to the end-user. The dashboard can be shown with a simple <iframe> or using the Javascript API (which just dynamically adds the <iframe> to the DOM).
<iframe src="https://tableau.example.com/trusted/{ticket}/views/Regional/GlobalTemperatures?iframeSizedToWindow=true&:embed=y&:showAppBanner=false&:display_count=no&:showVizHome=no">
</iframe>The src attribute is the modified URL from the Share button, and the ticket parameter utilizes the data-binding of the framework. Using the iframe - or using any other mechanism - the browser then loads the dashboard automatically, and the user may interact with it as expected. Your application doesn't have to do anything else until the user leaves or reloads the page.

Provisioning
The most overloaded task when scoping an embedded analytics development project is provisioning. There must be a process in place for user management in Tableau as well as your application. When you add a user to your application, will they automatically have access to Tableau analytics or is that an extra paid feature? Once you determine that the user should have Tableau access, how is that access granted?
The recommended approach is that the administration area of your application is extended to handle automatically provision users on Tableau Server using the REST API. This process ensures that the two systems automatically remain in sync. If the two systems get out of sync, the trusted ticket endpoint will return -1 resulting in hard to track down errors or worse, the authorization will be wrong.

Going to Production
One requirement resulting from step #6 is that the user redeeming the trusted ticket be able to connect to the Tableau Server directly. If your users are not part of your organization and not sitting behind your firewall, that means making Tableau Server accessible from the internet. Tableau best practice is not to open Tableau Server to the internet directly, but instead utilize a reverse proxy for access to your protected internal network. The topic of a reverse project or internet gateway is well beyond the scope of this article, but needless to say, you need one.

Conclusion
This article gives an overview of Tableau trusted authentication and points out some of the potential pitfalls not immediately apparent from Tableau's online help documentation.
Zuar Portals are an easy way to provide branded Tableau dashboards. Monetize your data or provide secure access outside of corporate firewalls.
Transport, warehouse, transform, model, report & monitor: learn how Zuar Runner gets data flowing from hundreds of potential sources into a single destination for analytics.


